1. 项目环境
- 操作系统:Mac OSX Catalina 10.15.1
- IDE: IntelliJ IDEA CE(社区版)
2. 创建项目
2.1. 安装Spring Assistant插件
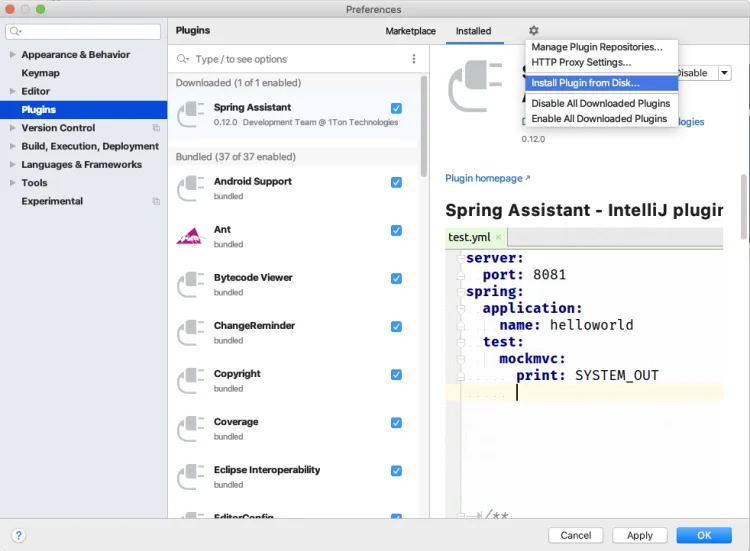
在官方插件市场搜索Spring Assistant并下载
在Preferences > Plugins设置中,选择**Install Plugin from Disk…**安装下载好的插件zip包
2.2. 使用插件新建Maven项目
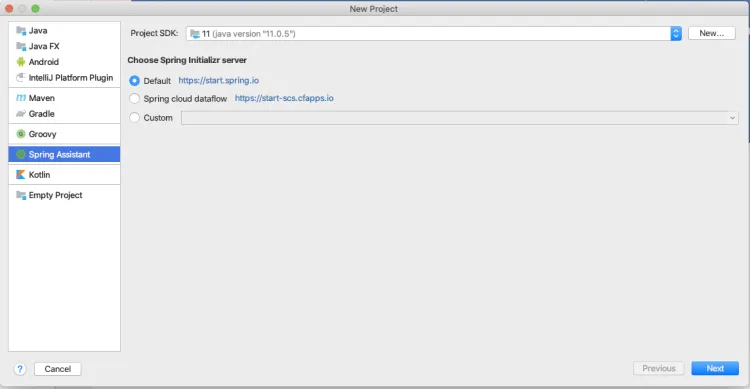
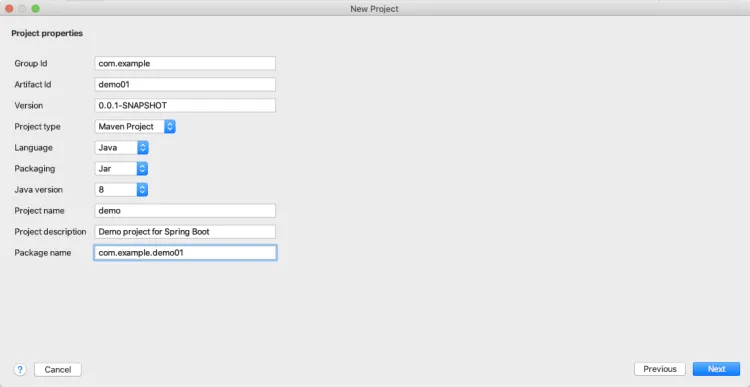
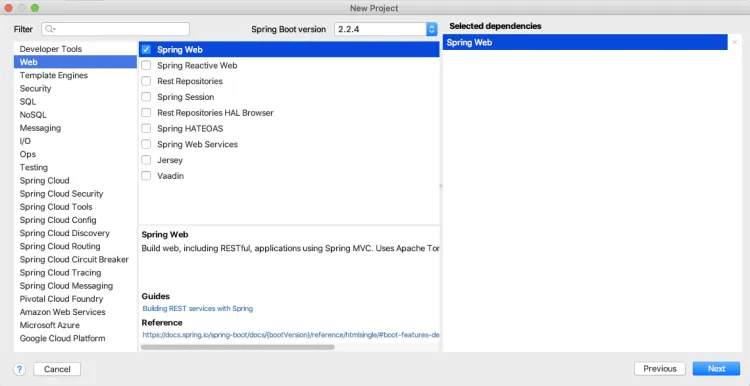
选择Spring Assistant按步骤新建项目
Step 1:
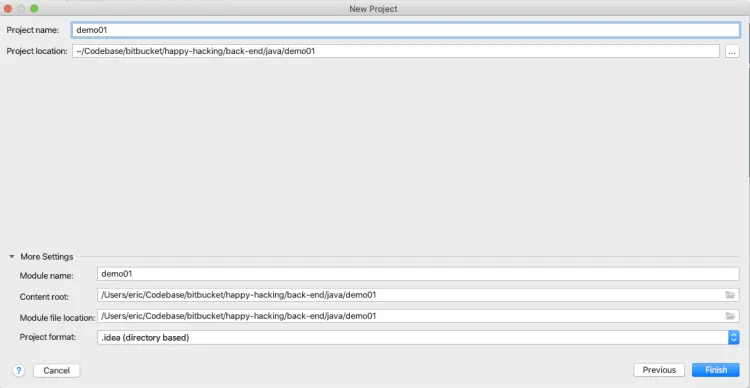
Step 2:
Step 3:
Step 4:
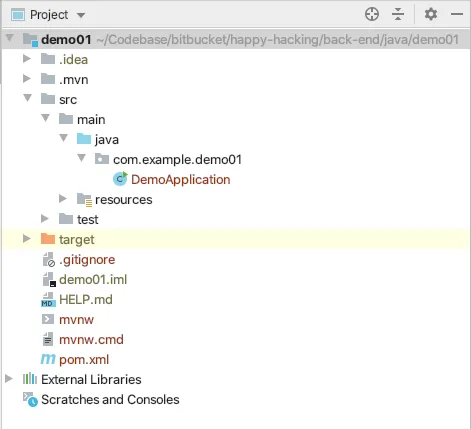
2.3. 项目构成
文件目录结构:
pom文件依赖:
1
2
3
4
5
6
7
8
9
10
11
12
13
| <dependencies>
<dependency>
<groupId>org.springframework.boot</groupId> <artifactId>spring-boot-starter-web</artifactId>
</dependency>
<dependency>
<groupId>org.springframework.boot</groupId> <artifactId>spring-boot-starter-test</artifactId>
<scope>test</scope>
<exclusions>
<exclusion>
<groupId>org.junit.vintage</groupId> <artifactId>junit-vintage-engine</artifactId> </exclusion>
</exclusions>
</dependency>
</dependencies>
|
3. 运行项目
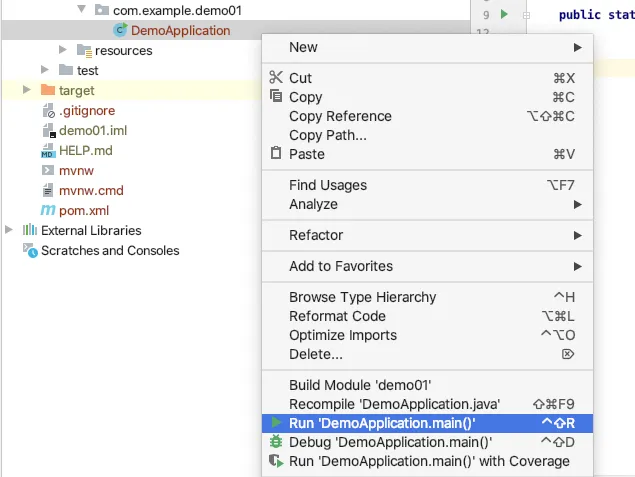
选中DemoApplication文件,右键选择Run or Debug
运行结果:
Chrome测试:
*** 当前Web应用没有设置url mapping规则 ***
4. 添加控制器
创建控制器类,并声明**@RestController** 注解
1
2
3
4
5
6
| package com.example.demo01.controllers;
import org.springframework.web.bind.annotation.RestController;
@RestController
public class DemoController {
}
|
使用**@RequestMapping**注解设置url映射规则,并创建handler方法
1
2
3
4
5
6
7
8
9
| package com.example.demo01.controllers;
import org.springframework.web.bind.annotation.RequestMapping;
import org.springframework.web.bind.annotation.RestController; @RestController
public class DemoController {
@RequestMapping("/")
public String sayHello() {
return "Hello";
}
}
|
5. 再次运行
Done!

